
This is a quick round up of some of the accessibility features in Office 365 that might help you manage the varied communication needs of our socially distant, digital world.
There is a slight disparity between some of the features, depending on the package you are using. However, broadly speaking, you can use with MS Word, One Note, PowerPoint, Outlook and Teams.
Tip #1
Tell Me What You Want To Do
”Cortana - can you just scan this important email I wrote and pick up any typos and bad grammar?" No of course she can’t - she’s not yet that smart.
But there is an inbuilt app in Office 365 that you can use called Tell Me What You Want to Do which can help out with your standard Office applications like Word, PowerPoint and One Note.
Tell Me is a tool where you can enter words and phrases about what you want to do and get to feature you want to use or the actions you want to perform.
When you're editing a file in Office 365 you can access Tell Me by tapping the screen next to the light bulb and start typing what you think you want to do. As you type in the text ,Tell Me immediately starts to list different options for you to choose – see the picture below
Click here to read more about Tell Me.

Tip #2
Got a Team Meeting Organised? Then Turn on Live Captions
Now we a getting more comfortable using video conferencing as a meeting space to exchange ideas; share skills; or just for a general get together, you could take a look at a great and underused feature.
Live captions are generated in real time as people talk. The captioning software is getting smarter and smarter. Better at picking up accents, and not making mistakes in spelling / grammar, the transcription process is seconds behind the spoken word.
It is worth testing it out for the following reasons:
- Primarily for the benefit of anyone in your meeting who is either deaf or hard of hearing. For profoundly deaf people, without having a signer present, a video call could only possibly take place if everyone one had their cameras on, so they could lip read.
- Likewise, if you are working from home and living in a shared flat or have a sleeping toddler who you have just got off to bed, being able to join a meeting with captions has its benefits.
- There is emerging research that captioning increases attention and participation at meetings. People get distracted but listening added to reading gives greater focus - even in the point above.
Read more about using captions in a Team meeting

Tip #3
Press the Record Button
Another benefit of a video conference meeting in Teams, which has yet to be fully realised, is recording the meeting and sharing it with those who could not attend.
In our sector we are always over stretched, and never more so than now. Perhaps it’s not just conferencing fatigue that prevents your invitee from attending. Perhaps they are going to watch the recording later, because they are already booked on another meeting?.
There are a few unwritten rules here before you press the record button:
- You must get the group to agree that it’s OK to record the meeting
- And their assent for you to share the recording with everyone who was invited
- In addition, you will have to remind any latecomers that this is a recorded meeting (and not to use any bad language?!).
Your video is saved on your SharePoint server in the Stream application and you will get an email when it has finished processing itself and you can retrieve it. If you have also turned on captions you can go in and check and correct the transcript at this point.
Recording a meeting and sharing with the participants is a very good idea. The best way of sharing an internal meeting would be to create and share a link to the recording, when you send over a roundup of the meeting’s key points by email. If you have external stakeholders, then you would need to upload the video file to You Tube and share a link privately.
Remember you held the meeting because there was important information to share, so sharing the recording can make the meeting accessible for people who couldn't attend at the time.
Read more about how to record a Teams meeting. Also find how to view and edit a transcript, plus options for sharing.
Tip #4
Using the Dictation App – talk don’t type
While we’re still on the subject of audio recording, it’s an easy link into the next recommendation to make your life easier if you hate or have difficulties typing.
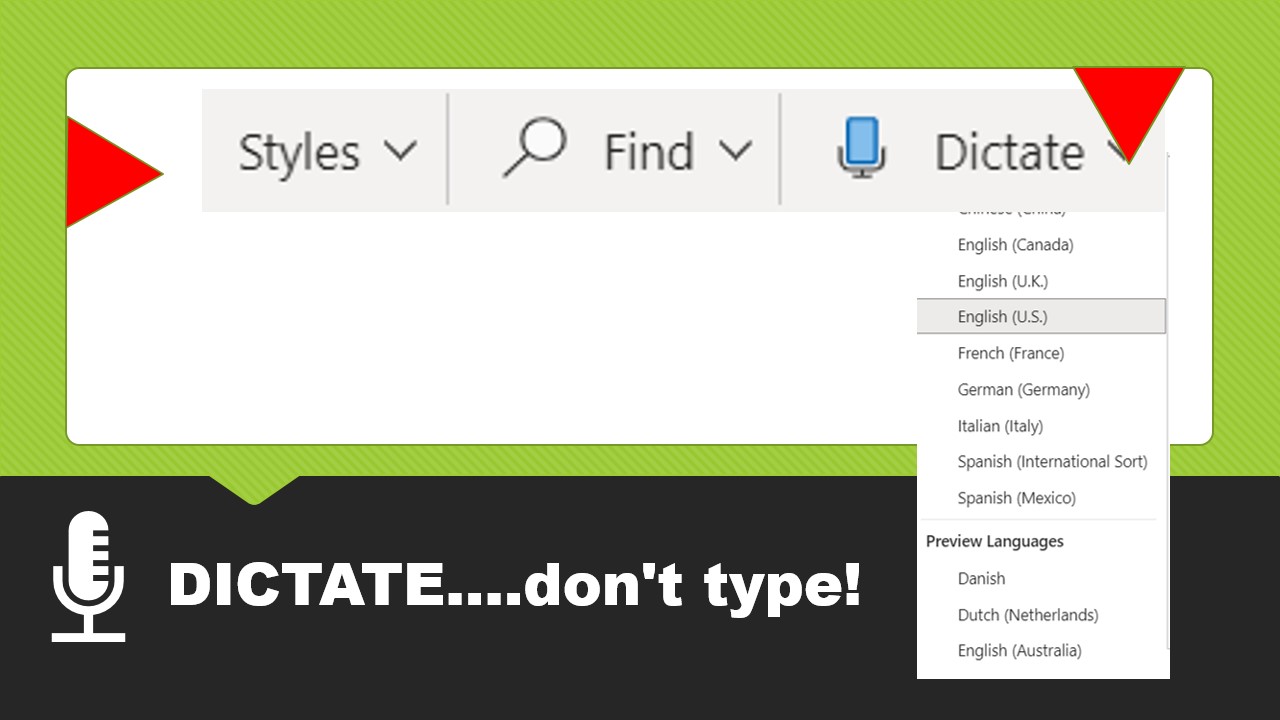
Office 365 has a great new dictation app that is included in MS Word and One Note online, which allows you dictate your correspondence and thoughts. The software is good at transcribing and of course any mistakes it has made you can always pick up either visually or when you check spelling and grammar before sending or printing. You will find the Dictate option under the Home tab of the menu ribbon - look out for the Microphone icon.
The really nice thing is it enables you to work at your own pace and helps if you are not a good typist. You will probably be most comfortable using an external headset and mic plugged into your laptop or PC. But obviously there won’t be any problems if you are using it on the phone or tablet either at home or walking around the park. Although having used it, speaking slowly and clearly are a must.
More support using Dictation here
Tip #5
Using the Immersive Reader
The immersive reader is a full screen reading experience to make your written content more accessible when you use Microsoft Word, PowerPoint, One Note and Teams. You will find the reader in the 'View Ribbon'. Here are a few of the dynamic features your readers can elect to change when they use the reader:
- Listen to the document read aloud, by selecting play at the bottom of the window
- Change the narrator voice, its speed and gender
- Set text size, line spacing, font and themes to suit individual learning needs.
- Use grammar tools such as parts of speech to identify text on the page - for example, highlighting every verb on the page in a different colour
- Include the in-built picture dictionary to give a visual clue as to the meaning of the word
- Translate each word on the page and hear how it is pronounced in its original language
- Change the overall theme colour
With all of these features there is an immediate link to better communication with non-English speakers because you can use the translate function. There are also big opportunities to improve basic literacy; and support people with learning disabilities.
You cannot make someone read your document in the immersive reader, if they don’t know about it. So, it’s a great idea to spread the news and show people how it works. Of course, school age students have been using it for years – so ask a younger family member to show you how they use it to get a feel for its potential within your organisation.
Further Immersive Reader How To support links here

Please Feedback
If you have found this article useful and tested any of the five features, do let us know your experience of using them. We have not tested them ourselves with people who have a range of different needs, and so are really interested in your experience - good or bad! Please contact philippaleary@superhighways.org.uk to discuss further.
Stay in touch
If you would like to receive news and updates about training, tech tips, resources and opportunities for small charities and community groups in London please sign up to our mailing list.